Passing the Test: How to Evaluate Mead

These slides from BJCP teach you what exactly you’re looking for when tasting a mead. They also released a Mead Exam Study Guide.

Mead is evaluated based on its style. The most common categories offered in competitions include: traditional, melomels, methelglins, braggots, and mixed category.

Factors that are taken into consideration when judging your mead:

  • Aftertaste:
  • Aroma:
  • Appearance:
  • Bubbles:
  • Carbonation:
  • Color:
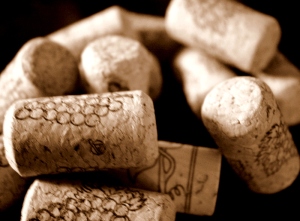
  • Cork:
  • Drinkability:
  • Flavor:
  • Mouthfeel:
  • Strength:
  • Sweetness:

The most basic concern when judging your mead is BALANCE- balance between the acidity-sweetness-tannins, and balance between the honey taste and other taste like fruit or spice. You then want to make sure you can distinguish the honey in taste and aroma. Lastly you want to focus on the expression of the additional flavors (fruits or spices) that will affect certain factors when judging your mead such as color, taste, and aroma.

According to BJCP these are steps to take when judging mead:

  1. As soon as the sample of mead is poured, inhale the aromas and jot down your notes.
  2. Then check the sample for color, carbonation, and clarity.
  3. Smell the mead again and take a SLOW sip. Distinguish the flavors you are tasting, where in your mouth the flavors seem to be more prominent, and how the sample feels on your tongue. Was there a lingering aftertaste and what was it?
  4. Between each sample cleanse your palate with water or plain crackers and bread.

There are more resources available at the BJCP Mead Exam Resources

References:

Beer Judge Certification Program- Index to Mead Guidelines

BJCP Mead Scoresheet

Bella Online 

Preamble to “A Treatise on Mead Judging”

How Water Treatment Affects Mash pH

Why Does Mash pH Matter?

  • Mashing can only be done when the pH is between 5.1-5.3 because that is the desired range for the conversions of sugars. Factors affecting the pH of your mash includes the color and quantity of malt added as well as the ions in the water you are using. Most homebrews have a pH> 5.3 thus there needs to be a type of treatment to bring the pH to about the 5.2 range. 

How to Measure pH:

  • pH (litmus) strips: not as precise
  • precision pH strips: cost effective and practical
  • electronic pH meter: very expensive

How to Change Your Mash pH

  • Add gypsum, epsom salt, or calcium chloride to lower the pH. The calcium and magnesium ions from those chemicals reduce the alkalinity of the water. However you must be very precise when adding these chemicals because the sulfate and chloride react with the phosphorous in the mash, thus producing off-flavors. To determine the correct amount search for specific calculators like this one on Brewer’s Friend.
  • Phosphoric acid, lactic acid, and sulfuric acid will lower the alkalinity of the mash. But again you must be very precise with the amount you decide to use.
  • Lactic Bacteria is added to acid malt for a short period to create a reaction that yields lactic acid. This will lower the pH.
  • Acid rest breaks down phytins in the malt to yield phytic acid, which then lowers the pH
  • Add 5.2 Stabilizer (a powdered additive) to lower your pH to exactly 5.2

Why Does Water Treatment Matter:

  • Because beer is 95% water, the type of water you use in homebrewing will contribute to the taste of your beer.  Chlorine and chloramine in water will react with the malt phenols in the wort to yield chlorophenol- a compound that gives beer a medicinal taste. The chlorine can also kill or reduce the metabolism of your yeast. Different styles of beers require different water profiles. 

What Each Ion Does:

  • Chloride will affect the mouthfeel and complexity of beer. Accentuates malt character. Too much chloride will give a medicine-like flavor.
  • Chlorine reacts with aromatic compounds called phenols in the malt, which will yield chlorophenols that give an off-flavor. 
  • Bicarbonate & Carbonate determines the acidity of the mash (if levels are low then the pH is low and vice versa). It neutralizes the acidity of dark roasted malts. Reduces water hardness by binding with calcium when boiled.
  • Sodium affects the mouthfeel and body of your beer. Too much will result in a seawater taste
  • Sulfate brings out hop bitterness and dry sharp hoppy feeling. It lowers the pH. Too much sulfate brings an astringent flavor to your beer.
  • Calcium lowers the pH while mashing and helps precipitate proteins during the boil. It also acts as a yeast nutrient and helps with beer stability.
  • Magnesium reduces mash pH. It also acts as a yeast nutrient and affects water hardness. Too much will give a sour, dry, harsh taste to beer.
  • Potassium blocks enzymatic reactions in the mash.

How to Treat Each Ion:

  • Chlorine:  Use a Campden tablet (1 tablet will work for 20 gallons) or purchase a carbon block water filter that attaches to the faucet.
  • Bicarbonate & Carbonate: You want 25-50mg/l for pale beers and 100-300mg/l for darker beers
  • Sodium: Add table salt (sodium chloride) to accentuate bitterness and enhance flavors and fullness of beers. Sodium chloride accentuates caramel flavors in malty beers. Want between 10-70mg/l, up to 150mg/l can enhance malty body and fullness while any level above 200mg/l is undesirable.
  • Chloride: Want less than 150mg/l and never to exceed 200 mg/l.
  • Sulfate: For pilsners and light ales you want 10-50mg/l. For most ales you want 30-70mg/l.
  • Calcium: Add calcium chloride to increase levels. Want level to be between 50-150mg/l.
  • Magnesium: Use Epsom salt to increase magnesium sulfate levels. Want 10-30mg/l. Be careful in doses because magnesium sulfate is a diuretic and thus can lead to dehydration.

The following table is from John Palmer How To Brew Table 16 – Salts for Water Adjustment

Brewing Saltand Common Name Concentration at 1 gram/gallon Grams per level teaspoon Effects Comments
Calcium Carbonate (CaCO3) a.k.a. Chalk 105 ppm Ca+2 158 ppm CO3-2 1.8 Raises pH Because of its limited solubility it is only effective when added directly to the mash. Use for making dark beers in areas of soft water. Use nomograph and monitor the mash pH with pH test papers to determine how much to add.
Calcium Sulfate (CaSO4*2 H2O) a.k.a. Gypsum 61.5 ppm Ca+2 147.4 ppm SO4-2 4.0 Lowers pH Useful for adding calcium if the water is low in sulfate. Can be used to add sulfate “crispness” to the hop bitterness.
Calcium Chloride (CaCl2*2H2O) 72 ppm Ca+2 127 ppm Cl-1 3.4 Lowers pH Useful for adding Calcium if the water is low in chlorides.
Magnesium Sulfate (MgSO4*7H2O) a.k.a. Epsom Salt 26 ppm Mg+2 103 ppm SO4-2 4.5 Lowers pH by a small amount. Can be used to add sulfate “crispness” to the hop bitterness.
Sodium Bicarbonate (NaHCO3) a.k.a. Baking Soda 75 ppm Na+1 191 ppm HCO3 4.4 Raises pH by adding alkalinity. If your pH is too low and/or has low residual alkalinity, then you can add alkalinity. See procedure for calcium carbonate.

John Palmer also suggest that there should be a balance between sulfate and chloride:

  • 2:1 SO4 to Cl is good for bitter beer
  • 1:2 SO4 to Cl for mild ales
  • 1:3 SO4 to Cl for stouts and porters
  • Chloride and Sodium add the maltiness of a beer.
  • Sulfate highlights bitterness and reduces malt flavor.

Resources:

Homebrewing Myths

1.  Don’t use aluminum brewing pots. This myth just costs you money.  Aluminum brew kettles work just fine — despite what you may read on message boards.  They also tend to be cheaper than stainless steel brew kettles, saving you money.
surprised-cat-gasp

2.  Homebrewing will save you money. If you brew, you know this isn’t true.  Like all hobbies, brewing is going to cost you money.

Gasp

3.  Don’t squeeze your grain bag. This myth comes because people think squeezing will release the tannins in the grain.  But tannins are only released by chemical reaction, not the pressure of your hand.  Feel free to squeeze your grain bag to get as much wort out of it as you can — it will increase your OG and won’t add any additional tannins.

surprised-open-mouth

4.  Plastic fermenters let too much oxygen in.   Unless you’re fermenting beer for a very long time (three or more months, at least), a plastic bucket isn’t going to let in enough oxygen to impact your beer.

surprised-rainbow-face

5. Liquid yeast is better than dry yeast.  According to Wyeast and White Labs, when a single 11g packet of dry yeast is rehydrated it will yield approximately 200 billion cells. A single Qyeast pack contains about 100 billion cells. A single White Labs vial contains 70-140 billion cells. Also a pack of dry yeast is between $1-$2 while liquid yeast is about $7. So technically dry yeast will cost you less while offering a higher pitching rate.
desk flip
6. You get better results using green bottles.  Brown bottles are the best to use because they keep out the most light.
surprised-mother-of-god-bloody
7. You have to refrigerate your bottles with homebrewed beer. As long as the bottle hasn’t been opened you can leave your bottles in room temperature (just try to keep it out of the sunlight). Just refrigerate your beer prior to serving.
angry-say-what-again
8. Homebrewed beer isn’t sanitary compared to beers you buy at stores or restaurants.  FALSE! There are no known pathogens that  can survive in the high alcohol environment in beer, mead, wine, or cider. Mistakes made during brewing will result in off-flavors but the beer will still be safe to drink.

 misc-true-story-realistic

References:

Homebrewing Facts and Statistics

  • George Washington and Thomas Jefferson were both homebrewers (although, in the case of Jefferson, his wife Martha did more brewing than he did).
  • Beer was so important to the ancient Sumerians that they actually had a goddess of beer named Ninkasi—yep, that’s right, a goddess, in Sumerian society, women were the primary brewers.
  • Just weeks after President Carter signed the bill that legalized homebrewing, Charlie Papazian and Charlie Matzen launched the American Homebrewers Association (AHA) in Boulder, CO on December 7, 1978, with the publication of the first issue of Zymurgy magazine.
  • Representative David Skaggs of Colorado announced May 7th as National Homebrew Day  before Congress on Monday, May 2, 1988. The AHA celebrates National Homebrew Day every year with Big Brew, held on the first Saturday of May.
  • There are over 1,000 homebrew clubs in the US and over 1 million homebrewers in the US
  • In the colonial times soldiers were paid in beer

OMG

  • 1978: US passed H.R. 1337 saying how much you can brew beer for personal use
  • As of 2012 there are 1072 brewpubs, 922 microbreweries, and 81 regional craft breweries
  • Most popular holidays when Americans buy beer (in order from highest to lowest): 4th of July, Memorial Day, Labor Day, Father’s Day, Cinco de Mayo, Thanksgiving, Christmas, Halloween, Easter, and Superbowl Sunday
  • Out of all the states CA produces the most craft beer (2.2 million barrels in 2011) and has the most craft breweries than any other state

you dont say

References:

American Homebrewer’s Association

BeerInfo

Brewers Association

California Craft Beer

Growing Hops

BACKGROUND

  • Type of plant: Humulus lupulus: A perennial twining plant with annual vines that produce flowers called cones. When planting you use a rhizome (piece of root taken from a mature plant).  You cannot grow hops from seeds!
  • Season: spring-beginning of summer. Hops are a perennial plant.

PREPARATION STAGE

  • When to Order Hops

Farms harvest the rhizomes in March and April. Some stores will allow you to pre-order them.

Links to order hop rhizomes:

  1. Adventures in Homebrewing (Begin shipping in April)
  2. Freshops (For domestic US shipping only)
  3. MoreBeer (Rhizome Pre-order sale)
  4. Northern Brewer (Can’t ship to HI, AK, WA, ID)
  5. Northwest Hops (Very early shipping, usually late-february to mid March)
  6. Williamette Valley Hops 
  • How to Store Hops Before Planting

Upon receiving the hops, refrigerate them (not below freezing temp) and ensure that they are well-ventilated.

  • Picking a Location

Southern exposure is the ideal choice because hops need 6-8 hours of sunshine a day. But if that’s not possible then east and west exposure will work but the cones will not be as large. The soil should be light-textured and allow for drainage. You aerate the soil by turning it over several times.  Typically the pH is 6.0-8.0. You should fertilize the soil liberally before planting. Ensure that the soil is rich in phosphates, nitrogen, and potassium. The soil should contain 20-30% organic matter like compost or dehydrated cow manure. Zymurgy advised to apply 5 lbs of fertilizer per 100 square feet once in the early spring and then 6 weeks later. Choose a place with a lot of space. Hops can grow up to 1 foot/day. Also make sure that there is protection against strong winds because they may break the vines.

ACTION TIME

  • How to Plant

Plant hops in the spring so you avoid the winter frost. Rhizomes can be planted vertically or horizontally but it is advised to place the root side of the rhizome faced down. But if there are buds already starting to show, ensure that they are kept pointing upward. Place the rhizomes about 4 inches deep. You can cover the soil with straw or light mulch to inhibit weed growth and help retain moisture in the soil. This part of the plant that is under the soil is called the crown and the vines shoot off the crown.

For mixed variety plants, give 5 feet between plants. You want this distance because hops roots grow very quickly and take control of the field they’re in unless you separate them and trim the roots each season. You trim the roots by taking a spade and cutting around the rhizome to trim the roots back about 1 foot. This is done in spring. For identical varieties give 3 feet distance between plants.

  • Taking Care of Your Hops

Hop vines (aka: bines) can grow as tall as 25 feet so it’s preferred to plant next to an arbor, fence, post, or trellis. You can also place a stake in the ground, tie a string or twine to a hook and make a line. Try to use a plastic twine/string since it is less susceptible to rotting caused by the sun and moisture. When the bines are 1 foot in length you can begin wrapping the bine around the string/twine and it will continue to grow from east to west around the twine (this is why hop vines are called bines!) Do not do this during a cool or cloudy day because the shoots are brittle at that time and may snap. Instead wait for a warm sunny day (particularly in the afternoon) since the shoots are more pliable then. Remember that year after year you will want to reinforce your trellising because it may have weaken from the weather, environment, or just by time.

Mag, from Perm’s Brew Pick and More designed this growth system. For other inspirations just google “hops trellis”.

In dry climates or a very hot summer the hops may need to be watered daily. But too much watering can cause the rhizome to rot. During the first year, the young hops have a small root system so they require frequent watering. 

It takes about 125 frost-free days before the bines produce flowers. Healthy bines will produce about 1-2lbs of dried flowers.

After the first year of growing the hops, the initial shoots should be pruned off because they are not very strong. The second pair of shoots that spring up are the sturdier second growth. After choosing 3-4 bines from the second growth, prune the other bines at the stem of the base so that all the nutrients are directed into going to the 3-4 main bines.

  • Diseases to Watch Out For

Pseudoperonospora humuli (downy mildew) is the main disease to watch out for. The mildew occurs in spring. The bines will look brittle and spikey and will stop growing. Curled underleaves with a silvery upper surface and black underside is another sign of mildew. When you see these leaves you must remove them immediately lest the mildew spreads. Crown infection can lead to crown death and plant death. Bud infections will lead to poor plant vigor. Vine infections will spike the growing point. Downy mildew is caused by having too much moisture trapped in the leaves. Therefore using sprinklers are a bad idea, rather use drip irrigation so that the water is going directly to the roots while the foliage remains dry. Prevent mildew by stripping leaves off the bottom 3 feet of the bine. However rainy weather can also cause mildew and that is a factor hard to control. Thus some growers use a fungicide (anything containing copper hydroxide) to provide protection against mildew. Hop varieties more susceptible to mildew are Cascade and Williamette. Nugget and Pearle hops are hardly at risk for mildew.

Verticillum wilt (wilt) damages hops because it reduces water and nutrient flow throughout the entire plant.  A sign of wilt are leaves with dull green tissue alternating with yellow bands. Remove the leaves immediately to prevent the spread of infection. You can also use fungicides with copper hydroxide to prevent wilt.

Verticillium wilt (Verticillium albo-atrum ) on common hop (Humulus lupulus ) - 5394163

Phorodon humuli (hop aphid) are translucent pale green bugs that reproduce very quickly and are usually spotted on the leaves underside. Once the eggs hatch they will spread to all parts of the bines. Hop aphids appear in cool weather. Remove the aphids by using an insecticidal soap or any other organic insecticide. However take care of noting the waiting time required by most insecticides. For example Diazinon requires a 14 day waiting period between spraying and harvesting. A more natural alternative to insecticides are using ladybugs- the aphid predator. MoreBeer suggests refrigerating the ladybugs so that they will be forced to use energy to stay warm. After a day release the hungry ladybugs on the bines. Or you can plant Golden Marguerite flowers that attract ladybugs.

Tetranychus urticae (spider mites) come out during the warm weather. Barely visible to the naked eye, a sign to watch for are fine white webs under leaves and small freckle-like spots on the top of leaves. Defoliation and red, rust colored cones are other signs. Since spider mites like the warmth, they will affect the top of the bines first and then work their way down. The insecticide used for aphids will also work for spider mites. Or a more organic way is to buy praying mantis as spider mites are their natural prey.

Image

AFTERMATH

  • Harvesting Time

Harvest around late August/September. The first harvest usually yields very little because the plant is trying to first establish a crown and root system. Hops do not reach their peak harvest until the second year. Test its ripeness by squeezing a cone by your fingers. If the cone is damp, very green, and stays compressed after squeezing then it is not yet ready to harvest. The cone is ripe when it dries out and it re-expands to its shape. There will also be more lupulin (yellow powder) in the cone and will be very sticky. The hop aromas will also be more pronounced. Hallertauer, Tettnanger, Fuggle, and Saaz varieties ripen faster than Cascade, Willamette, Nugget, Bullion, and Spalt.

When you harvest, cut the string/twine and guide the bines to the ground. The bines will begin to dry and the sap will return to the roots for winter storage. You can then pick the cones off. If the hops don’t ripen at the same time then harvest each cone as it ripens.

After harvesting cut the bines back 3 feet. The winter frost will kill off the bines, and after which you can cut the bines further back and cover them until spring.

  • Drying Hops & Storage

Hops are 70% moisture when ripe, but only 10% when dried to the equivalent of commercial hops. Use a food dehydrator and dry your hops for several hours. They are ready when you split the hop and it is dried on the inside.  It will feel papery and the petals will break off in the end.  You can also dry the hops in the oven at very low temperature (It should not exceed 140 degrees F). Or you can place the hops on a screen and let them dry OUT of direct sunlight and in an enclosed area to keep bugs out. Another common technique is placing the hops in a brown paper bag and allowing them to dry there for a week or two.

If cones are not properly dried, they become moldy, wilted, or even rancid and cannot be used for brewing. Take care not to overdry hops to the point where the petals and stem shatter in your hand when you open the cone. You will lose the hop’s Alpha Acid Content (the level of bitterness ). Familiarize yourself with the Alpha Acid Content of your breed of hops and depending on that level, you may want to use store bought hops designed for their alpha acid content.

After drying, store the hops in an airtight container (to reduce oxidation) and place them in the freezer or refrigerator (depending on how soon you plan on using them). Most suggest using a ziploc plastic bag and filling that bag to the top with hops to ensure no oxidation.

  • Testing Alpha Acid Content

You can send your hops to a lab that will test for the alpha acid content. However this usually costs between $20-$30. The following links are labs that will do this:

  1. Brew Laboratory
  2. Siebel Institute of Technology (located in White Labs in San Diego)

Dr. Leonard Perry from University of Vermont released a guide on how to perform a home test to check the alpha acid content of homegrown hops. He uses phenolphthalein as the indicator.

Additional Resources

Hops: Organic Production (free digital pdf from National Sustainable Agriculture Information Service)

HopsTV (link to Youtube Channel for HopsDirect.com)

Hop Varieties for Beer Brewing (Includes the alpha acid content linked to each variety)

How to Grow Hops (Offers a list of hops and their desired growth location)

Instructions on How to Grow Hops (Midwest Supplies PDF)

Managing Powdery Mildew of Hops in the Northeast (PDF from the University of Vermont Extension Program)

Small Scale and Organic Hops Production (free pdf from Adventures in Homebrewing)

The Two Spotted Spider Mite in the Northeast Hopyard

References:

BeerSmith Growing Hops in the Garden

Brewing Techniques Hops in the Garden

Hop Downy Mildew 

MoreBeer Growing Your Own Hops

Zymurgy In the Backyard

Grains and Adjuncts Charts

IMG_0069

Background:

An adjunct is any ingredient, besides the malted grain, that is added to beer. There are two types of adjuncts: kettle adjuncts and mashable adjuncts. Kettle adjuncts already contain fermentable sugar so they can just be added to the kettle during the boil. Mashable adjuncts contain starch, which is unusable to yeast therefore the adjuncts must be mashed so that the enzymes can convert the starch into fermentable sugars. The most common adjuncts in brewing are rice, wheat, sorghum, corn (maize), rye, potatoes, and oats.

Reasons to Use Adjuncts:

  • Improves Clarity

The proteins from malted barley create a lot of haze in the beer, a big No No. Therefore you want to dilute the protein in the wort. This is accomplished by adding low protein adjuncts such as rice and corn. Rice and corn have very little protein so when heated in the wort, they do not want to give up their protein and instead try to retain the protein. Thus adding low protein adjuncts will clarify your beer by diluting the protein from malted barley.

  • Enhance Flavors by Reducing Stale Flavors

Now low protein adjuncts are good to improve clarity but you must be careful not to use them in excess because they can dilute the concentration of soluble nitrogen from the malt. If this occurs then the wort will have a low concentration of soluble amino acids that yeast needs in order to grow. The yeast will not perform to its best ability so the beer can result in off flavors. In addition malted barley contains precursors that lead to stale flavors thus to prevent that you must dilute the barley malt with a non-malt adjunct.

  • Affect Color

Corn, potato, and rice will yield a beer lighter in flavor and lighter in color than an all-barley malt version of itself. Rye results in a strong distinctive bite and will give an orange tinge and spicy character to beer.

  • Improve Head Retention

Unmalted barley has a high concentration of beta glucan, an enzyme that is destroyed in malted barley. Beta glucans are need to improve foam stability.

  • Add Smoothness and Increase Mouthfeel

Oats add smoothness and increase mouthfeel to beers, most commonly in stouts. But you do not want to go overboard with oats because they are low in starch (so the yeast will not grow), high in protein (that will lead to a hazy beer) and high in beta glucans (which in an excess will impede lautering- a process in which the mash is separated into the clear liquid wort and the residual grain)

  • Increase Alcoholic Content

Malted wheat contains a high concentration of beta amylase, an enzyme that is very efficient in breaking down starch into fermentable sugars. By using malted wheat most, if not all, the starch will be broken down into fermentable sugars and thus yielding higher alcoholic content.

Visual Charts and Guides to Adjuncts

BeerSmith Grain List includes other factors such as color and must mash.

BYO- Grains and Adjuncts Chart: Have tons of info about American, Belgian, German, and British grains.

OneBeer.net Grains and Adjuncts Chart: 

Resources:

Adjuncts Explained

How to Use Aduncts to Brew Beer

The Adjuncts: Malt Madness

Getting Started: The Racking Process

Racking is defined as transferring mead from one fermenter/carboy to another. It is important to rack the mead in order to filter out the spent yeast, to separate mead from fruits and herbs, and to clarify the mead.

Racking Steps:

1. Sanitize empty carboy, stopper, airlock, siphon hose, and racking cane. (Tip: We use the dishwasher to store the bottles and fermenter during brewing to free up some counter space in the kitchen)

IMG_6050

2. Position the fermenter on a tabletop/counter and the empty carboy on a chair or floor to let gravity move the mead.

3. Attach the hose to the racking cane and begin siphoning your mead from the fermenter to the empty carboy. Pay attention to the bottom of the racking cane to ensure that no spent yeast is being siphoned.

IMG_6064 IMG_6061

4. Use your hydrometer to measure the specific gravity. The must should have fallen to about 1.030 or less.

5. Place the stopper and airlock and return the mead to the cool, dry place.

Getting Started: The Bottling Steps

BOTTLING STEPS 

  1. Obtain a corker (we used an Italian Double Lever Corker), bottles of either shape or size, corks, siphon pump, bottling bucket, and Star San (or any other approved sanitizing agent)
    Italian Double Lever Corker
    Italian Double Lever Corker
    Corks
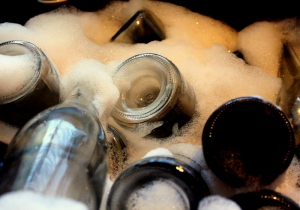
  2. Sanitize all the equipment. We usually clean our kitchen sink first with PBW and then fill it up with the Star San solution.
    Sanitizing the bottles
  3. Make sure you run the Star San through the spigot of the bottling bucket.
    Run the Star San through the spigot
  4. Make sure the sanitizing solution is gone from the bottles (don’t worry if there is some foam from the Star San in the bottles, as long as the liquid is gone everything is ok).
    Sanitized bottles with some foam
  5. Place the siphon into your primary or secondary and begin siphoning the batch into the bottling bucket.
    Transferring from the secondary to the bottling bucket
  6. Once the bottling bucket is full, begin transferring the batch into the bottles. (Tip: when pouring into the bottle, try to tip the bottle to the side to allow the liquid to flow from the side of the bottle rather than directly into the bottle. This will prevent foaming from occurring.)    
  7. Pour into the side of the bottle
  8. After all the bottles are filled, begin corking
    Corking
  9. A Voila! All you have to do now is wait until your batch is ready for consumption!
    All Done!

Getting Started: Finding the Equipment

I’m not going to lie to you. Your first purchase towards homebrewing will cost you at least $100. But don’t worry, once you have the equipment every purchase after that will be significantly less. Just think of this as an investment to your future of drinking delicious, crisp, and perfect beer and mead. Because Jason and I live in Orange County, CA we tend to go to the following three homebrewing shops. (But during our SD brewery hopping excursions we have stumbled upon a few homebrewing shops that we liked).

Stein Fillers:

I really like this store. It is in Long Beach and I found the staff very helpful and courteous. You can also buy grain where they mill it for you without any additional cost. They are well-stocked and well-priced. They also have a beer prayer that I must share with you all…

“Our lager, which art in barrels, hallowed be thy drink. Thy will be drunk, I will be drunk, at home as in the tavern. Give us this day our foamy head, and forgive us our spillages, as we forgive those who spill against us. And lead us not to incarceration, but deliver us from hangovers. For thine is the beer, the ale and the lager, forever and ever. Barmen.”

Oshea’s:

This store is located in Laguna Niguel. My experience in this store varies. I stopped going on weekends because the line tends to build up. I have had bad and good customer service here depending on the staff. Also a lot of their items tend to go out of stock so I suggest calling them before trekking to the store.

Addison Homebrew Provisions:

Located in Fullerton, this store is hidden from the public eye. It is a small homebrew shop but it does carry the necessary items for brewing. They also offer grains that can be milled in the store at an additional cost (I think it may be $1 or so, which isn’t bad at all).

I also tend to purchase things online because sometimes there are these crazy deals that are just too good to pass up. For instance, there was a buy one, get one free sale for a Better Bottle that was $20! I would just sign up to receive their catalogs. Remember to consider shipping fees as well. The following are some websites I frequent:

  • Northern BrewerBefore checking out, remember to google Northern Brewer coupons or promotion codes to get the most deal.

Northern Brewer - Homebrew Supply - Beer Making Kits, Hops, Beer Bottles, Beer Ingredients, Beer Brewing Equipment and More!

Midwest Supplies

Austin Homebrew

Click here to read what equipment you need

Dry Hopping: Specific Uses and Techniques

Definition:

  • Dry Hopping is adding hops to the fermenter or keg after fermentation for the sole purpose of enhancing the beer’s aromas. It DOES NOT add bitterness.  The initial hops used during the boil is for extracting the alpha acids to provide bitterness. Late hop additions during the last minutes of the boil are done to accentuate the aromas but is not as efficient as dry hopping because the aromatic oils evaporate too quickly.

Using the Right Hops

  • For dry hopping you want to select hops that have low alpha acid content (x<6%) because those hops are high in aromatic oils. Match your hop to the style and origin of beer. 
  • Examples of hops with low alpha acid content: Cascade, Fuggles, Saaz, Crystal, Hallertauer, Tettnanger, Wiliamette, and Goldings.
  • However there are some “dual-used” hops (hops that are high in alpha acid content and high in aromatic oils). These are Chinook and Columbus.
  • Make sure you are using the freshest hops. Check for signs of oxidation like cheese-like aromas from the hops.
  • If you are fermenting your beer in a glass carboy with a narrow neck then you want to use plug or pellet hops for ease of accessibility. Pellets will sink after a while while whole and plug hops will float.
  • Keep in mind that when you add pellet hops there will be some foaming due to their large surface area that supports nucleation of CO2.
  • Pellets will also impart a very overpowering hop flavor and aroma because the lupulin glands have burst and all the aromatic oils went to the beer at once but don’t worry it will mellow out over time.
  • You can also use whole leaf hops as they tend to leave no residual matter behind.

How Much Do You Use

  • Typically you use 1-2 oz per 5 gallons. If you want a mild floral aroma then use less. If you seek a strong burst of hop aroma you can use 4 oz/5 gallons.

When to Dry Hop

  • You want to Dry Hop at the end of your primary fermentation because if you do it during, then a lot of the aromatic oils can be lost with the CO2 release. Also the hops can clog your blow-off tube.
  • Dry Hopping during your secondary fermentation ensures maximum exposure of the aromatic oils to your beer without the leftover yeast found in the primary. But because you are dry hopping past the aerobic phase of fermentation place a layer of CO2 over the surface of your beer to prevent oxidizing your hops compounds.

Dry Hopping Techniques

  • A mesh bag is optional if you are dry hopping in a carboy. It’s at the brewer’s preference if you want to remove the bag at the end or if you prefer just to separate the hops from beer when re-racking. But if you are using a keg then you MUST use a mesh bag so it doesn’t plug your keg.
  • You want your hops to remain suspended in your beer, not float on the top or sink to the bottom. A technique is to add an additional mass (like glass beads) to the mesh bag and and tie a string around it so you can control how deep the hops go. (But remember to sanitize your mesh bag and glass beads). Here is an example.
  • You can dry hop for 3 days in a carboy or for several weeks in a keg. Some say overexposure of the hops contribute a grassy, oily taste but it all depends on your preference.
  • Contamination is not a likely occurrence in dry hopping because A) it’s at the end of fermentation so the alcohol minimizes the risk of contamination, B) there’s not that many sugars left in the beer for bacteria to consume, and C) hops are antimicrobial so they are a poor environment for contaminants.
  • While dry-hopping make sure to keep temperatures in the low-mid 60s F.

References:

Brew Strong: Dry Hopping

Dry Hopping Beer

Dry Hopping: Enhanced Hops Aromas

Dry Hopping For Great Aroma

Dry Hopping Techniques

Get More Aroma with Dry Hopping

What Is Dry Hopping?