Mead: The Nectar of the Gods

Archaeologists found evidence of the earliest use of honey in rock drawings that dated back to 15000 BC. Historians concluded that the “primitive” tribal cultures “sought out the most calorically rich food sources available at any given time in the annual cycle of plant growth and animal behavior” (Schramm 4).

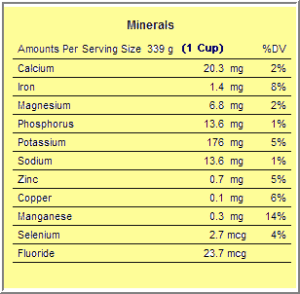
Honey was the prized food for consumption because of its nutritional value. Honey provides instant energy through its composition of fructose and glucose. Honey is also high in vitamins such as thiamin, niacin, B6, riboflavin, and pantothenic acid. It also has minerals such as copper, calcium, magnesium, iron, potassium, sodium, manganese, zinc, and phosphorous. Honey also has antioxidant properties, is fat-free, and cholesterol-free. One tablespoon of honey has 64 calories.The following are nutrition facts in 1 cup of honey.

honey-nutrition-1honey-nutrition-2

Mead has been referenced in literature as “wines as sweet as honey”. It’s definition is honeyed wine. Historians postulate that the discovery of honey’s fermentation properties was actually an accident. The earliest humans gathered honey and attempted to store it in a watertight container, but it actually spoiled or rather “fermented” and was still consumed despite its transformation into an alcoholic state. Ken Schramm gives a wonderfully detailed illustration of how the first fermentation process possibly began:

“A group of paleolithic hunters (European, Mesopotamian, Indian or African, take your pick) prepares to embark on a hunting expedition of unknown but presumably significant duration. They fill their water skins and set out. Early on in their hunt, the dominant make comes across a hive of bees, and, not wanting to pass up a food source, drains off some of his water and fills the skin with the honey from the hive. In the interest of preserving the honey for the rest of the tribe (or in the interest of keeping it all for himself), the honey water is carried for the rest of the hunt and he drinks a lower-ranking male’s water…spontaneous fermentation ensues and by the time the hunting party returns from the hunt, a magical transformation has taken place. The honey water is mood elevating, and makes the female members of the tribe more receptive to sexual advance.”

Following that, it is said that the word “honeymoon”  actually comes from the tradition of bestowing a month’s supply of mead (one cycle of the moon) to the happy couple in order to improve their chances of bearing children.

Whatever your reasons are in mead-making, you have chosen a hobby that possesses a historical and cultural value. I urge you to purchase The Complete Meadmaker by Ken Schramm. The book serves as a detailed but necessary guide to any mazer.

The following are resources I found very informative about honey:

1. Honey Nutrition Facts

2. Benefits of Honey

3. Honey

4.  Medicinal Uses of Honey

Getting Started: Brewing Equipment Needed

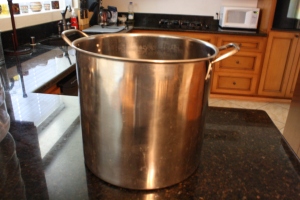
  • Stainless Steel Stockpot: Try to get one that can carry 16-20 quarts (15-19L). It is also advised to purchase one with sturdy handles that are attached to the actual pot itself.

IMG_6352

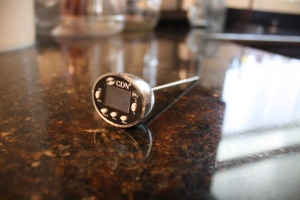
  • Thermometer: Try to get a glass thermometer because they float upright in your must so you can read it easily. Just be careful when losing it because if it breaks while in your must then the whole batch is ruined. A good idea is to get a thermometer that ranges from 50 degrees F to 200 degrees F in increments of 10 degrees F or less.

IMG_6377

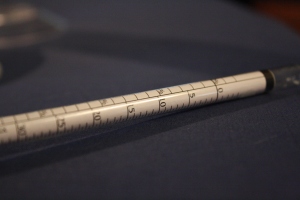
  • Hydrometer: This instruments reads how much sugar is dissolved in the solution using specific gravity. “Pure water at a temperature of 68 degrees F (20 degrees C) has a specific gravity of 1.000. Adding sugar makes the density of the solution-and therefore the specific gravity-rise. When this occurs, the hydrometer floats higher in the solution changing where its scale will be read” (Schramm 28).

IMG_6285

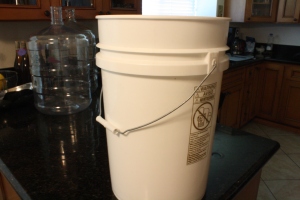
  • Plastic fermenter: The plastic fermentation buckets ranges from 5-8 gallons. There should be a hole on the top of the lid for the stopper and airlock. The reason plastic is desired because plastic fermenters won’t break or melt when the hot honey is added. However, if the interior is scratched then there is a potential for bacterial growth.

IMG_6363

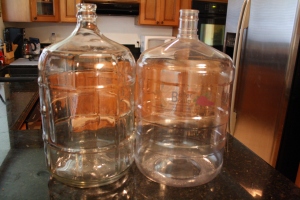
  • Glass carboy: The carboys come in 5-10 gallon glass bottles that do not scratch easily but if dropped, can break and ruin your batch as well as harm you. This is why some people use rubber carboy handles to ease the lifting and transferring process. Plastic carboys like Better Bottles are made from clear, stain resistant, non-porous PET plastic that’s impermeable to oxygen. Just be careful when cleaning to prevent scratching.

IMG_6327

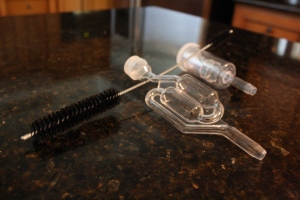
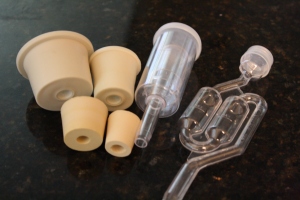
  • Airlocks: These locks provide the barrier that prevents contaminating bacteria or wild yeast from entering the fermenter and mead while allowing carbon dioxide to escape from the actively fermenting mead. The two most common are the Bubbler Air Lock and the Three-Piece Airlock. The Three-Piece Airlock is generally used for primary fermentation because if there is an overactive batch that foams all the way to the top of the fermenter to the airlock, it is easier to clean the separate pieces. In addition the Three-Piece is resistant to “suck-back” where negative pressure in the fermenter causes the third piece to suck down on the gas tube. With the Bubbler, the “suck-back” will draw all the airlock fluid into the wort. The Bubbler is used in the secondary fermentation because it allows a more accurate visualization of carbon dioxide escaping. If you don’t feel like purchasing an airlock or if you’re from the ghetto, insert a hose into the rubber stopper in your fermentation bucket and place the other end into a sanitized jaw filled with fluid (this method is most helpful when you are making a large batch or if your batch has vigorous fermentation). Another tip is to purchase an airlock brush to clean the fermentation residue out of the airlocks.

IMG_6409

  • Drilled Rubber Stoppers: This is used to adjoin your fermenter with the airlock. Stoppers No. 6 and 7 work well with 5 gallon carboys. If you are using carboys of a different size consult with the homebrew shop about the stopper size you need.

IMG_6340

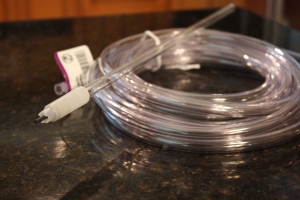
  • Siphon Hose: You need clear, food-grade vinyl tubing with a 5/16 inch and 3/8 inch inner diameter. It is best to get one that is six feet long so there is leeway when re-racking. It is good to replace the siphon every 6 months to ensure sanitation.

IMG_6232

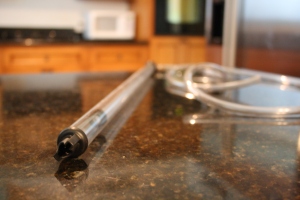
  • Racking Cane: This is a “clear, hard plastic food-grade tubing bent at an angle near one end. The siphon hose fits snugly over the end and the cane is lowered into the mead to be racked, to provide you control over siphoning. This allows you to avoid the sediment pack or fruit residue…” (Schramm 29).
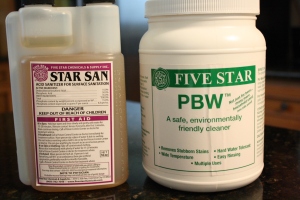
  • Sanitizer: I prefer Star San for the sanitizer. You can buy it in any hombrew shop or website. I tend to buy the 32 oz because I know I will always need this. If you have a deep kitchen sink (preferably two), clean one sink thoroughly (and I mean scrub all that food residue) and then use the drain stopper. Add the Star San and fill that sink with water. You then have a basin designated to sanitizing your equipment.

IMG_6226

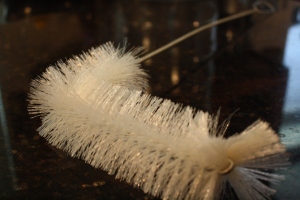
  • Cleaner: After re-racking your mead, there will be a thick layer of sediment in your carboy. PBW (Powdered Brewery Wash) is an alkali cleaner which if left overnight in the carboy, will require no scrubbing the following morning. It is also advised to purchase a carboy brush, preferably 24” long and bent at a 90 degree angle to reach all the corners of the carboy’s interior. There are also brushes that attach to a drill bit to ensure a faster more efficient cleaning method.

IMG_6303

  • Bottle Tree: Although you won’t need this when brewing your mead, you will find this useful when it comes time to bottling. Buy one that comes with a carrying handle on top. It makes drying your bottles easier and more efficient.

References:

  1. GotMead
  2. Northern Brewer

Getting Started: Bottling Equipment

Here is a link to the page of shops suggested to purchase brewing equipment.

The following list was found in Ken Schramm’s The Complete Meadmaker:

  1. Bottle Filler: This stops the flow of mead into your bottles as you fill them. They use a valve to cut off the flow, closed either by spring or gravity.

IMG_6245

2. Bottle Cappers: There are two different types of cappers-the Bench Capper and Lever Capper. Bench cappers sit on a bench, table, or floor, and press the cap down onto the bottle using a single handle. They are easier to use only wen the bottles are uniform in size. Lever Cappers have two or three claws that squeeze the cap down. However they do not work well on bottles with large diameter necks.

Lever Capper Lever Capper

3. Bottle Brush or Bottle Washer: All bottles should be cleaned prior use. A jet bottle washer attaches to the spigot above your sink and channels the water flow into a copper pipe with a valve. A bottle is pressed upside down over the pipe to release the jet of water. But if you have really dirty bottles then a bottle brush is more suitable.

IMG_6381

IMG_6303

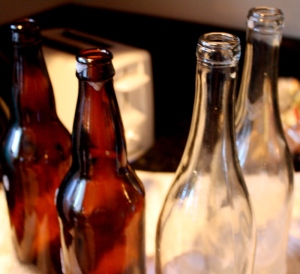
4. Bottles: 5 gallon batches of mead fill about 53 12oz bottles or 25 750ml Champagne-style wine bottles. American sparkling wine bottles are great to recycle as mead bottles because they will accept a crown cap and can withstand the pressures that build up in a sparkling mead. Avoid using regular wine bottles because if your fermentation is not complete it can result in glass breakage.

Sanitized bottles with some foam

Sanitized bottles with some foam

5. Bottle Caps: Crown caps are the easiest and most economical choice. They come uncrimped.

6. Siphon Pump: Used to transfer beer from kettle to carboy, or carboy to carboy.

IMG_6232

However I if you choice to use the corking method rather than capping, then you need the additional following:

  1. Italian Double Lever Corker

01-IMG_8564

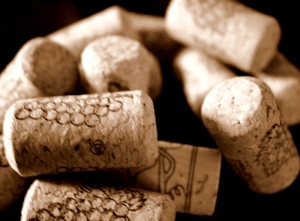
  1. Corks: Using corks will allow some oxygen to seem into the bottle, a process that is called micro-oxygenation. This can benefit the flavor of the mead. 
Corks

Corks

Getting Started: When to Bottle?

It is very important to know when it is the appropriate time to bottle your mead. Because mead ferments slowly, it is possible to bottle mead that still ferments while in the bottle. The mead can become a “sparkling mead” and the fermentation can create enough pressure to cause the glass to break. So please be cautious when bottling.

There are many different methods to determine when your mead is done fermenting.

  • 8 weeks method: Wait a minimum of 8 weeks before you bottle your honey. This method however varies with the type of honey used, amount of honey, and the ingredients used in the recipe. Hence, I recommend other methods first before resorting to this.
  • Airlock method: Once the airlock stops bubbling, wait an additional 2-3 weeks to bottle.
  • Flashlight method: Take a flashlight and shine it through the mead. Check for the clarity of the mead-if there are any particles floating or bubbles traveling in your mead, then it is NOT ready to bottle. Also check if the top and bottom of the mead is clear. If there is still some dead yeast that has settled at the bottom, even after re-racking, then it is still NOT ready to bottle. FYI: this method is not useful for melomels because they tend to be too dark.
  • Chemical Method: Fermentation can be stopped manually through the addition of certain chemicals. Potassium sorbate can be added just before bottling to prevent any additional fermentation from occurring BUT it will not stop an already active fermentation. Potassium metabisulfite (Campden Tablets) prevents wild yeast, bacteria growth, and oxidation in your mead.
  • The Specific Gravity Method: This is the most scientific and accurate method to determine if fermentation has stopped. This requires an original gravity (OG) reading and a present gravity reading. When the specific reading falls to about 0.1 of the original reading, then it is time to bottle. Another way is to multiply the OG by the rate of the attenuation of your yeast (which is on the yeast packet) and subtract that result from the OG. That number is your target gravity (TG). Then take a current gravity reading of your mead. If that gravity reading is the same as the TG, then it is time to bottle.

References:

  1. Target/Final Gravity Question
  2. To Bottle or Not To Bottle?
  3. Mead-Lovers FAQ
  4. How to Halt the Ferment of Mead

CSS: Cleaning, Sanitizing, and Sterilizing

Definitions:

  • Cleaning: Ridding all the dust, stains, scum, dirt, and other visible contaminants from your homebrewing equipment. Elbow grease required.
  • Sanitizing: Ridding, rinsing, and removing invisible contaminants like microorganisms and bacteria. Chemicals needed.
  • Sterilizing: Removing germs through high temperature (over 200 degrees F)

Why does beer get infected in the first place?

  • Beer is pretty delicious. We know that and we love it. So is it any surprise germs want to bathe, live, and reproduce in beer? Not really. Think of it, beer provides a warm environment. Beer also contains natural sweeteners, nutrients to feed germs. It’s an ideal living condition: a warm environment with plenty of food.

Actions to Take:

  • CLEAN CLEAN CLEAN the area where you are brewing. Dust off those countertops, sweep the floor, and vacuum that carpet floor. 
  • I love dogs. They’re pretty awesome. But when it’s time to brew please keep them in the other room. With clean and sanitized equipment everywhere it will be easy to recontaminate them with your pet’s hair and dander.
  • Take care of your equipment. ALWAYS clean and sanitize before brewing and you must clean BEFORE sanitizing. After brewing thoroughly dry your equipment and store it in a dust-free mildew-free place.

Types of Cleaners & Sanitizers

IMG_6226

*Prior to using any product, read the directions and warning labels carefully

  • iodine-based products

Commonly used as disinfectants by hospitals, restaurants, and breweries. Iodophor requires 2 minutes of soaking. It binds immediately to any microorganism it contacts and destroys it. WARNING: Stains plastics and human skin. Dilute 1 ounce per 5 gallons of water.

Star-San’s main ingredient is phosphoric acid. Because it contains a foaming agent, this product can clean the nooks and crannies of your equipment.

  • chlorine-based products

Chlorine is found in a common household product, bleach. This is a money-saver. Dilute 1 ounce per 1 gallon. Unscented bleach is better because scented products leave a layer of film that can create off flavors in beer. You must rinse all equipment thoroughly with hot water to neutralize the chlorine. Use chlorine products only with glass because plastic can absorb the chemical which will then create off-flavors in your beer. Never use chlorine products with stainless steel since overtime it will create holes in the equipment. WARNING: Don’t mix ammonia with chlorine bleach because it will create toxic chlorine gas.

  • caustics

Lye is used for only the most stubborn and difficult to treat stains. Technically it is a cleaner but small concentrations of lye dissolve and kill any bacteria along with organic buildup.

  • ammonia

Best use for bottles. Dilute 1 cup of ammonia to 5 gallons of water. WARNING: Pungent Odor.

  • percarbonates

A mixture of sodium carbonate and hydrogen peroxide. Reacts with oxygen and mild alkali to produce oxygen bubbles that loosen soils. The hydrogen peroxide offers some sanitizing properties but percarbonates are mainly used as cleaners. Does not require rinsing after use.

PBW (Powder Brewery Wash)  has the highest concentration of percarbonate. Use 1 tablespoon for 1 gallon. Soak equipment with stubborn stains overnight. Rinse twice with warm water after using.

Tips

  • Hoses, airlocks, and siphons are relatively cheap so it may be better to just purchase new ones considering they can’t be scrub.
  • For plastic equipment use a sponge or soft cloth to avoid creating scratches where microorganisms can live

IMG_6381

  • For glass use a carboy brush

IMG_6303

  • For stainless steel, you can use a carboy brush but it can still scratch the surface so its better to use a softer cloth
  • Avoid using household cleaners since they are toxic for human consumption and too mild for thorough cleaning and sanitizing.
  • All equipment that comes into contact with cooled wort and fermented beer must be sanitized (including your hands that touch this equipment)

References:

Making Labels

  1. Brewers Association created guidelines detailing criteria requirements for making beer labels. Information should include beer net contents, beer label type size and legibility, beer class and type destinations, beer government warning requirements, beer mandatory label requirements, and formulas.
  2. Labely: This website reminds me of grapics from WordsArt on Microsoft. It is very simple to use. You basically complete a step-by-step process where you can pick certain designs for each step. You can upload your own picture, BUT it will only allow a small cropped version of it on your label. Definitely not the greatest tool if you wish to customize a lot of features. Great if you just need a basic label to differentiate your beer.
  3. Northern Brewer sells bottle labeling paper in four colors: yellow, green, blue, and white for $5.99
  4. Beer Labelizer: Very easy guide to making beer labels using their templates. There are some free templates but the really nice ones require a membership fee. You can also upload your own picture but like I said with Labely, this program doesn’t really allow you to customize a lot.
  5. Alcohol and Tobacco Tax and Trade Bureau also offers information regarding regulatory standards of beer labels.
  6. UPrinting offers various label templates depending on the program you use such as Photoshop, Illustrator, CoreDraw, Acrobat, and Publisher.
  7. Beer Clings are reusable labels that you can either customize yourself or purchase their standard template. 12 labels cost around $5 but if you want to customize the label it will cost more.
  8. NoonTime Labels: You can choose a label and input the information or customize your own label. This offers wine and beer labels.
  9. Zumula: Choose either a pre-designed label or customize your own. Offers both wine and beer labels.
  10. Online Labels: Offer different label templates you can download.
  11. Google: Just google beer or wine label templates and hundreds of pages will pop up.
  12. Reddit: I found that on r/youngjobs, r/forhire, r/homebrewing, or r/HBL there are plenty of people who can give you advice on how to make your labels or even offer to make your labels for you for free. However if they are doing the work to make your labels I suggest offering at least  some monetary compensation or if anything a shipment of your homebrew.


Malt Guide

Background

Most of the flavors and sugars in beer are derived from malt. In fact malt defines the various characteristics of beer.  Malt can either come from grain and dry/liquid form.

Malting Process

The malting process consists of steeping the grain in water and allowing it to germinate. During germination the starches in the grain are converted into sugars, simple soluble starches, and other enzymes. The grain then must be kilned  in order for it to dry. Some sugars are caramelized like in crystal malt or blacken it like a black patent malt. The malt is now ready to be made into sweet wort by the home brewer.

There are 3 steps to the malting process.

1. Steeping:

Barley is intermittently submerged in water for about 36-48 hours to begin germination. Enzymes are released and simple sugars supply energy to the growing embryo.

2. Germination:

The steeped barley continues to grow and enzymes start breaking down proteins and cellular wall components. The steeped barley remains submerged for 3.5-4.5 days with air circulating through the germinating barley that is turned every 8-10 hours to ensure even germination.

3. Kilning:

Heated air circulates through the product to end germination. Kilning develops malt flavor and color and dries the malt to preserve its quality.  The finished malt then goes to a brewery where it is crushed and water is added to it. Biochemical reactions continue to break down the starches and proteins in the malt. The wort (sugar mixture rich in maltose and other amino acids) is created from the malt and is converted to ethanol by brewers yeast.

The following is a visual graphic of the malting process from probrewer.

Malt Flow Chart

HomebrewTalk offers a detailed chart about the flavors imparted from different kinds of malts. Very informative.

ProBrewer offers a pdf detailing how to identify different variants of malt and kernel grains.
MALTS AND ADJUNCT CHART FROM BEERADVOCATE
The following is a growing list of different malt & adjunct types.

Type Description
Base Malts Base malts usually account for a large percent of the total grain bill, with darker-colored specialty malts accounting for 10 to 25% of the grain bill. The only exception is wheat malt, which can make up to 100% of the total grain bill in brewing wheat beers. Base malts and, to some extent, light-colored specialty malts provide most of the enzymatic (diastatic) power to convert starches into fermentable sugars. The base malts provide the highest extract potential. Dark-colored specialty malts, caramelized malts, roasted malts, unmalted barely, and other malted grains are added in smaller quantities to obtain darker colors and to enhance flavor characteristics. Depending on the style of beer brewed, the brewer may use only one or two types of barley malts, or as many as seven or eight. Other grains used in brewing include corn, rye, and oats.
Caramel Malts Caramel malt is made from green malt that is produced by drying the wet germinated barley at controlled temperatures, causing the starches to convert to sugars and caramelize. The major variable in the process is the roasting temperature, which determines the depth of the color and the degree of caramel flavor. Caramelized malts come in a wide range of colors, from light to very dark amber, and with flavors ranging from a mild sweet caramel to caramel/burnt sugar. It is primarily known for its color control but can also provide body (dextrins), mouthfeel, and some sweetness. Caramel malt will also improve foam stability. Light caramel malts accentuate the soft malt flavor, while darker caramel malts promote a caramel, slightly sweet taste, European in flavor.
Dark Malts Specialty dark-colored malts have little or no enzyme activity because of high-temperature kilning or roasting. Consequently, specialty malts cannot be used alone in a mash. These malts are used in relatively smaller amounts than light-colored specialty malts because of their strong flavoring and coloring components. Some styles of beers, such as stout and Bock, cannot be made without the use of these specialty malts. Amber and brown malts are examples of specialty dark-colored malts.
Light Malts Light-colored specialty malts are kilned at higher temperatures than base malts and impart a deeper color and a fuller malt flavor and aroma to the finished beer. Enzyme levels are lower than for base malts. Vienna and Munich malts are examples of specialty light-colored malts.Pale Ale malt is most commonly associated with British ales, and has the flavor characteristic of full maltiness. It is well modified, and is well suited to a single temperature infusion mash. It tends to have fewer enzymes, although sufficient enough to allow up to 15% adjuncts in the mash. It also tends to have a lower haze potential, and is less likely to produce DMS, which can lead to a ‘sweet creamed corn’ aroma.Lager malt is less well modified in the malting process, and so is better suited to a program temperature mash. It typically has a high protein content, and has a thick husk which is rich in polyphenols (tannins), which can lead to protein haze and astringency. The 2-row variety tends to be lower in enzyme and protein levels and has a thinner husk than the 6-row malt, but this quality depends more on the strain of barley used to make the malt.
Roasted Malts Chocolate malt is not roasted quite as long as black malt; consequently, it is lighter in color – more dark brown – and retains some of the aromatics and flavor of malt’s sweetness. It imparts a nutty, roasted flavor to the beer but does not make it as bitter as black malt. There are no enzymes in chocolate malt. Chocolate is an essential ingredient in porters and stouts and can be used in mild ales, brown ales, and old ales, and can be incorporated into the grist of dark lagers.Making black malt involves roasting the malted barley at temperatures so high that they drive off all of the aromatics (malt flavor). There are no enzymes in black malt. In excess, black malt will contribute a dry, burnt flavor to the beer that may be perceived as a bitterness different from that derived from hops.
Corn Corn products have traditionally been the adjunct of choice among brewers. They are extremely consistent in terms of quality, composition, and availability and produce a spectrum of fermentable sugars and dextrins similar to that produced by malt upon enzymatic conversion.Corn has a sweet, smooth flavor that is compatible with many styles of beer. It is the most popular adjunct used in American breweries. It lowers the protein and polyphenol content of beers, thereby lightening body and reducing haze potential. Corn will provide a somewhat neutral flavor to the finished beer. A “corn” taste may be apparent, making it generally more suited to the sweeter dark beers and lagers than to the drier pale ales. It is, however, one of the best adjuncts to use for full-bodied bitters. Some brewmasters claim that the use of corn (10–20%) will help stabilize the flavor of beer.
Grits Grits consist of uncooked fragments of starchy endosperm derived from cereal grains. The starch of these adjunct products is in its native form, and is not readily attacked by the malt diastase enzymes during mashing. Consequently, these adjuncts must be processed by boiling in a cereal cooker to bring about solubilization and gelatinization of the starch granules and render them susceptible to diastatic enzyme attack. Unlike in America and Australia, grits are rarely used in British brewing, as cereal cookers are not found in most traditional British breweries.
Malt Extracts Malt extracts can be used as a sole source of fermentable sugar, or they can be combined with barley malt. The malt extract comes in the form of syrup or dried powder. If the final product is a dried powder, the malt extract has undergone a complete evaporation process by means of “spray-drying,” thus removing almost all of the water. For simplicity, use an 85% conversion factor when substituting dried malt for syrup. Syrups are more popular than dried malt extract, possibly because they are less trouble to store. A common problem noticed in malt extract beers is the thin, dry palate, which correlates with a low terminal gravity. Another common problem is the lack of a true “dark malt” flavor in dark beers.
Oats The high protein, fat, and oil content of oats is theoretically a deterrent to their use in brewing. However, oats have been used in the brewing process, particularly in brewing oatmeal stout.
Refined Starches Refined starches can be prepared from many cereal grains. In commercial practice, refined wheat starch, potato starch, and cornstarch have been used in breweries; corn starches, in particular, are used in the preparation of glucose syrups. Wheat starch has been employed in breweries in Australia and Canada, where local conditions make it economical to use. However, the most important source of refined starch is corn.
Rice Rice is currently the second most widely used adjunct material in the U.S. in the production of light-colored lager beers (30). Rice has almost no taste of its own, which is regarded as a positive characteristic since the rice will not interfere with the basic malt character of the beer. It promotes dry, crisp, and snappy flavors and is employed in several premium brands, including Budweiser. Some brewers prefer rice because it has a lower oil content than corn grits. One disadvantage in using rice is the need to use an additional cooking vessel because its gelatinization temperature is too high for adequate starch breakdown during normal mashing.Different types of rice vary widely in their suitability for use in brewing. Short-grain rice is preferred because medium- and long-grain varieties can lead to viscosity problems. In milling rice, a certain proportion of the rice kernels are chipped and broken, rendering them unsuited for table use because of their impaired physical appearance. It is this portion of the broken rice that is designated as “brewer’s rice.”
Syrups & Sugars The British are known for their use of syrups and sugars, which are mainly used as nitrogen dilutents. The reduction in proteins leads to shorter fermentation periods, cleaner yeast, and sharper filtration (allowing more beer to be processed with the same amount, or less, of filter aid). Another advantage in using syrups and sugars is that the carbohydrate component can be controlled and custom manufactured to the needs of the brewer. Syrups and sugars also allow for shorter boiling times and high-gravity brewing, and they can be used to expand brew house capacity. Finally, syrups and sugars are handled easily in bulk form. Cereal adjuncts need handling systems such as conveyors, dust collectors, and milling operations. Brewing syrups and sugars, having already undergone gelatinization and saccharification, can be added directly to the kettle or can be used in priming, thereby bypassing the mashing operation.
Sugar Dextrose is also known as corn sugar and is available in the trade in the purified form as a spray dry or as a crystalline powder. Dextrose sugar is added directly to the brew kettle during boiling.Various grades of sucrose are used in the brewing industry. Few brewers today use raw sugar; most prefer the more consistent products of the sugar refiner. Granulated sugar, the normal end product of the refining process, may be added directly to the kettle, but usually is dissolved in a solution before being added.Malto-dextrin is the most complex fraction of the products of starch conversion. It is tasteless, gummy, and hard to dissolve. It is often said to add body (palate fullness) to beer, increase wort viscosity, and add smoothness to the palate of low-malt beers. However, it is easy to increase the dextrin content of grain beers by changing the mash schedule or using dextrin malt. Malto-dextrin is of interest mainly as a supplement to extract brews.Caramel is used in brewing as a flavor and/or coloring agent. For example, many milds and sweet stouts contain caramel for both flavor and color. Caramel may be used either in the kettle or in primings to make minor adjustments to the color of the beer, but the choice of malt grist and the grade of adjuncts added to the kettle will determine the fundamental color of the beer.Invert sugar is a mixture of dextrose (also called glucose) and fructose syrup.
Syrups The two major syrups used in brewing are sucrose- and starch-based. The sucrose-based syrups have been refined from natural sources such as sugar cane or beets. The starch-based syrups are produced from cereals by hydrolysis using acid, exogenous enzymes, or a combination of the two to produce a range of syrups with different fermentabilities. In recent years, there has been a great development in the range of starch-based syrups produced from corn and wheat. In the U.S., these adjuncts are produced exclusively from yellow corn; while in Europe, they are produced from corn and wheat. The starch-based syrups are commonly referred to as “glucose” syrups. This name is misleading, however, since the syrups contain a large range of sugars, depending on the method of manufacture – dextrose, maltose, maltotriose, maltotetraose, and larger dextrins.
Unmalted Barley Unmalted barley gives a rich, smooth, “grainy” flavor to beer. Unlike the other adjuncts, unmalted barley will contribute foam (head) retention to the finished beer because of lower levels of proteolysis. However, the nitrogenous and complex proteins that contribute to head retention also contribute to chill haze problems. Clarity problems make unmalted barley inappropriate for light beers, which is one reason why corn and rice are preferred. It is essential in dry stout, e.g., Guinness Stout.Unmalted barley can be employed for as much as 50% of the total grist, but it usually makes up no more than 10 to 15% as an adjunct. High levels of unmalted barley can lead to a slightly harsh taste in the beer. It can also result in insufficient malt enzymes for the necessary hydrolysis of starch, protein, and beta-glucans. Incomplete degradation of beta-glucans can increase wort viscosity and runoff times, which could effect the stability of the finished product. These problems can be alleviated by employing a beta-glucans rest at a range from 45 to 50ºC, the temperature optimum of beta-glucanase. Another approach is to incorporate fungal or bacterial beta-glucanases and alpha-amylases to facilitate starch gelatinization in the cooker and mash filtration.Roasting unmalted barley at high temperatures makes roasted barley. Roasted barley is not black in appearance; it is rather a rich, dark brown. It has an assertive, roasted flavor, similar to roasted coffee beans, with a sharp, acrid after-palate, and is especially used in the making of dry stouts and porters. It contributes significantly to the color of the beer, enhances head production and stabilization, and whitens the head on the beer. There are no enzymes in roasted barley. Roasted barley produces a stronger, drier, more bitter taste than roasted malt and is less aromatic and drier, with a more intense burnt flavor than black malt.
Wheat Wheat malt, for obvious reasons, is essential in making wheat beers. Wheat is also used in malt-based beers (3–5%) because its protein gives the beer a fuller mouthfeel and enhanced beer head stability. On the down side, wheat malt contains considerably more protein than barley malt, often 13 to 18%, and consists primarily of glutens that can result in beer haze. Compared to barley malt it has a slightly higher extract, especially if the malt is milled somewhat finer than barely malt. European wheat malts are usually lower in enzymes than American malts, probably because of the malting techniques or the varieties of wheat used.Unmalted wheat often is used as an adjunct by brewers who wish to enhance head retention and foam stability. It also contributes to the body or “palate fullness” of the beer. Its high content of proteins greatly enhances foam stability. Beers made from significant amounts of wheat adjuncts are likely to be light in flavor and smooth in taste qualities. Wheat adjuncts are used in the same manner as barley adjuncts; but unlike with barley, there is almost no husk in wheat. Thus, tannins are not much of a problem. The gelatinization temperature range for wheat is between 52 and 64ºC.
List partially compiled using descriptions from The Brewers’ Handbook http://www.beer-brewing.com.

Resources:

Brew Monkey

ProBrewer

Calculators

Because brewing is an exact science, every bit of detail plays an important role in the development of your beer. To ensure a quality product you must take every factor into account, such as ABV, IBU, SG, SRM, and other chemical reactions. Luckily for you there are online calculators that do this work for you. All you have to do is plug in your numbers and you’re set.

  • Brewer’s Friend: This is an AMAZING page of all sorts of beer calculators.  They offer a Recipe Builder and the following calculators: ABV, Hydrometer Temperature, IBU, SRM, Dilution and Boil Off, Yeast Pitch Rate and Starter, Mash, All-Grain/Extract OG/FG, Water Chemistry Basic/Advanced, Brewhouse Efficiency, Quick Infusion, Bottling, Priming, Keg Carbonation, and Wine Making.
  • BYO Recipe Calculator: Aids in formulating your beer recipe. Just input the size of the batch, the ingredients, and other process variables. The calculator will then yield the OG, FG, IBUs, SRM, and ABV.
  • TastyBrew: This website has a sparging calculator based on Ken Schwartz “A Formulation Procedure for No-Sparge and Batch-Sparge Recipes.
  • PowersBrewery: This offers a yeast strain calculator where you input the White Labs or Wyeast strain of yeast you’re using and it gives you the ID Number, Average Attenuation, Apparent Flocculation, and Optimal Fermentation Temperature.
  • Brewheads: They offer the following calculators: Change/Strike Water Temperature, New Volume, Force Carbonation, and Hydrometer Correction.
  • BeerMath: There’s a calculator for Calorie, Color, Scaling, and Gravity Conversion.
  • ScrewyBrewer: They offer calculators for Rest Temperature, Mash Water Volume, Cylinder Volume, and American/Metric.

Mead Glassware

Believe it or not there is actually a purpose to serving mead in different glasses. Start by knowing the different parts of a glass.

For instance, the lip of the wine glass is the top edge of the glass and can either be cut and polished top (left) or a rolled top (right). 

the difference between cut rim and rolled rim [after Riedel]

The opening of the glass should also be smaller than the wider part of the glass in order to concentrate the aromas. The glass should be transparent (no images) and colorless so that your mead’s color appears more richer. Wine glasses with stems prevents the drinker from touching the bowl so that there are no fingerprints obscuring the glass and that your fingers are not warming the wine above proper serving temperature.

Appreciating the aromas of your mead is another special enjoyment. As you pour your mead into your glass, the aromas will begin to fill the glass in layers according to their density. At the bottom of your glass will be the heaviest layer (the wood and alcohol aroma). Then the middle layer of your glass will contain the green vegetal and earthy mineral aroma. The top layer will contain the lightest vapors (the flower and fruit aromas). Therefore different glass shapes are available depending on which particular aroma you want to feature. Slender glasses magnify the lighter floral and fruit aromas. Glasses that hold more than 25 ounces allow you sniff through the layers by inhaling gently and consistently for more than 10 seconds.

The shape of the glass also affects how the drinker will perceive the taste. A glass with a wide top requires us to sip the drink by lowering our head. But a glass with a narrow top requires us to roll our head back and lets gravity do its work and make the liquid flow. This delivers the mead to different zones of the palate.

For instance Riedel Rheingau glasses (left) have a gently curved lip around the rim so that your tongue will unconsciously curve up when sipping. The fluid therefore bypasses the acidity taste receptors on the tip of your tongue and instead travels to the sweetness taste receptors on the back of your tongue. The Riedel Rheingau glass is thus used for meads that have a more acidic taste. The Riedel Montrachet glass (right) has a wide rim that steers the fluid to the acidic taste buds. This glass is used if you wish to emphasize the acidity of your mead in order to balance the taste. The I.N.A.O. glass (middle), commonly called the  “all-purpose” glass, is generally used for any mead.

Riedel's Rheingau glassI.N.A.O glassRiedel's Montrachet glass

Sparkling meads should be served in glasses that hold 6.5 ounces or more and be narrow and tall to channel the bubbles in a continuous stream or be tulip-shaped (with a narrow mouth) to trap the aromas and bubbles.

The following chart is from the Riedel Glass company in Austria.

Riedel Red Wine GlassesRiedel White Wine GlassesRiedel Dessert Wine Glasses

References:

2 B A Snob 

Mead Made Complicated 

Wine Spectator 

Yeast Strains Charts

BYO: Pick which beer you want to make from the dropdown menu and a list of yeast strains pops up.

Yeast Strain Comparison Chart: Compares yeast strains from Wyeast and WhiteLabs.

Wyeast Labs: Home Brewing Yeast Strain Guide: Offers yeast selections for ales, lambics, lagers, and belgian ales.

Yeast Calculator: Offers substitutions and the common styles of yeast.

White Labs Brewing Yeast Attenuation Ranges: A comparative yeast chart organized by attenuation range